
David Dumont
05/12/2022
Using fonts in Next.js 13
If your website uses a specific font, you may need to import a font into your Next.js application. Next.js 13 brings some improvement in how you import font and some optimizations like managing Cumulative Layout Shift (CLS) problems during the page loading. In this article, we will cover the traditional methods to implement fonts in your Next.js projects, discover the issues of using them, and see why you should only use Next.js new font optimization features to manage your fonts.
Download fonts in the Head from Google url (don't do that🚫)
Maybe the simplest way to add a font to your project. Select a font from the google font website and copy the Link tag in the Head of your project. You will also need to attribute your font name in the font-family CSS property where you want to use it. If you plan to use this font everywhere on your website, it should be in your body.
In this example, we will use the font, Pacifico.
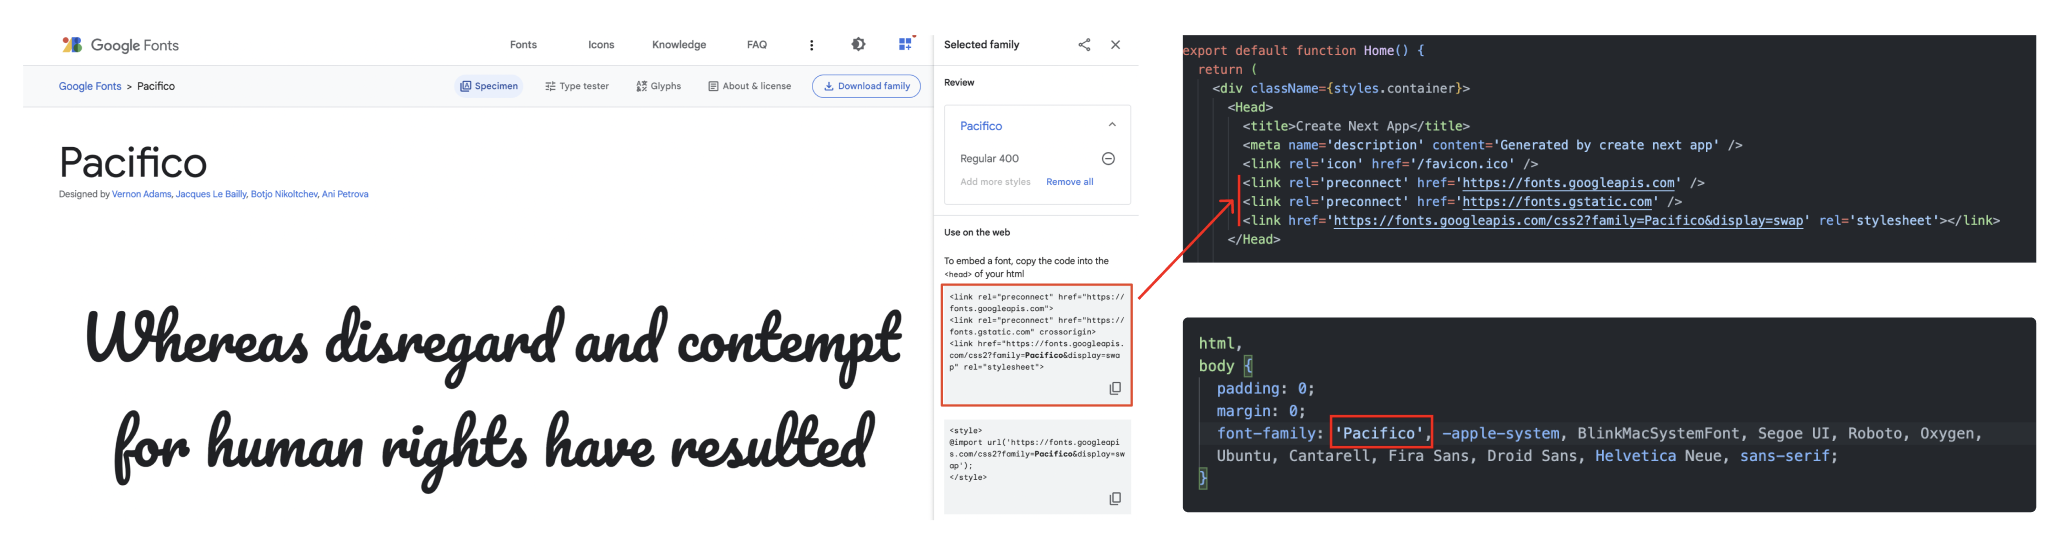
Here we go in a few seconds; the custom font is on your website, it's fast and straightforward, but it has significant drawbacks. By requesting the font in the <head> tag, we are fetching the font to the Google font API. When the page is loading, getting the font can be quite long, especially with slow internet.
In addition, this method does not correctly handle the Cumulative Layout Shift (CLS). The amount of space used by the system font and your custom is different, leading the UI elements of the page to change position when your custom font replaces the system font. This brings a bad user experience when navigating your website.
Conclusion: Slow loading time and CLS.
Local font
Another solution is not to use the google font API and directly download the fonts in your project.
On the google font website, download the font you are interested in and put it in the public folder of your Next.js application, for example, inside a fonts folder. Import the font in your CSS file, and you are ready to go.
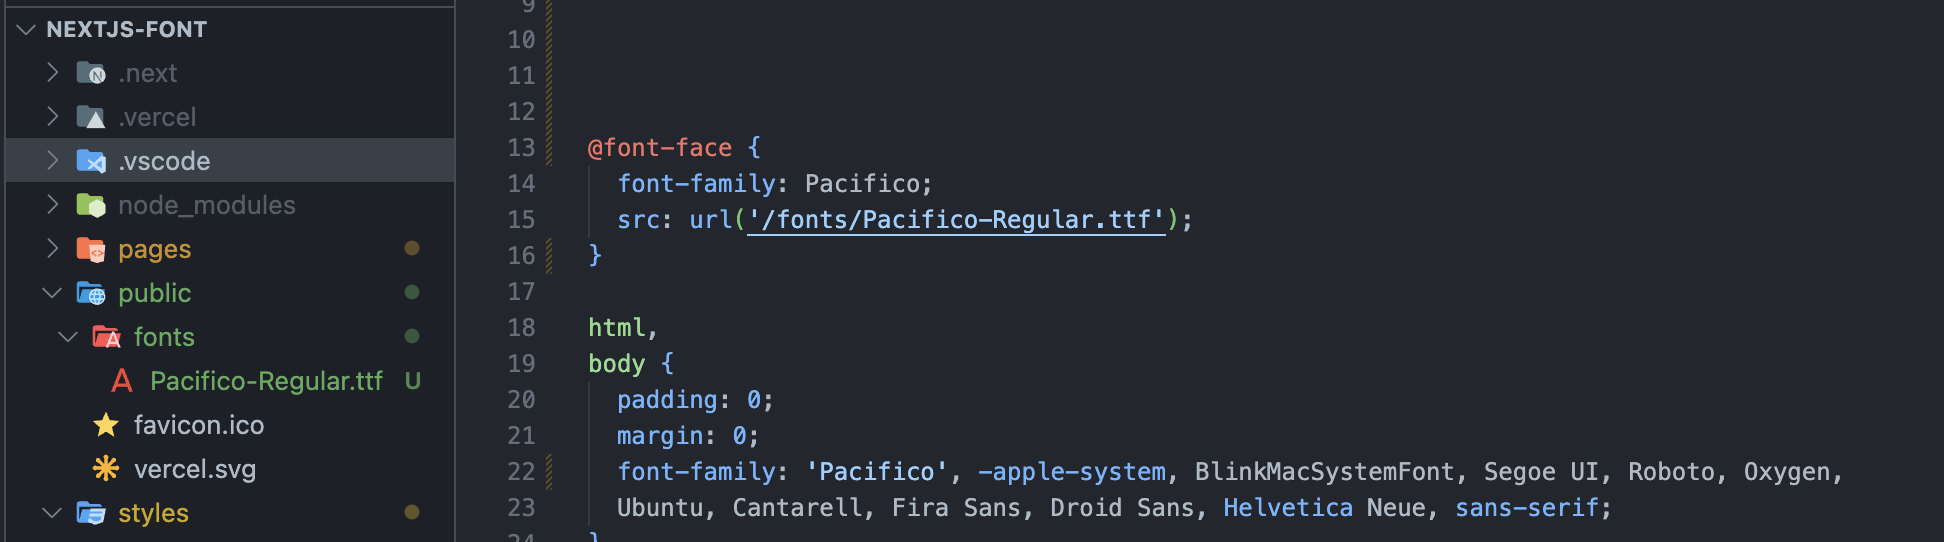
The font is inside your project and will benefit from the CDM of your website, delivering the font much faster than by fetching it from Google. However, this will still not handle the CLS properly.
So it is a better option, but still, it's not ideal
Conclusion: Do not handle CLS.
Next.js font ( recommended ✅ )
Lets now discover the star of the show, first lets see how to import a font using the new font optimisation feature from Next.js.
The new feature is not integrated within the core source code of the Next.js so will it will be needed to import the package separately
npm i @next/fontNow to use a font from the @next/font module, we need to import it and define a new instance of the font. We will then be able to apply the font to a component. It is essential to notice that the font will affect all the children's elements of the component. If you want your font to be applied to all your website, select a component that wraps everything.
import { Pacifico } from "@next/font/google";

const pacifico = Pacifico({
  weight: "400",
  display: "swap"
});

export default function Component() {
  return (
    <div className={pacifico.className}>
      ...
    </div>
  );
}
You can configure the font you import when you define the instance. You will be able to select a range of weights, the display method, the subset, etc. The properties may change depending on the font you choose. For more information, check the Next.js documentation about fonts optimization.
If your font is not from google fonts, it's almost the same, you will need to download it in your project and add the src path to your font instance.
import localFont from '@next/font/local'

// Font files can be colocated inside of `pages`
const myFont = localFont({ src: './my-font.woff2' })

export default function Component() {
  return (
    <div className={myFont.className}>
      ...
    </div>
  )
}
Next.js font optimization will download the web font at build time and serve it locally, speeding up its loading time. It will also automatically adjust the size of the fallback font, making the fallback font the same size as the font that will load, removing the CLS.
Conclusion: Fast loading and no CLS. Also, the developer experience becomes more accessible and more consistent.
Use Next.js font in Tailwind CSS
There is a property variable to attribute a CSS variable to a font imported via the @next/font.
...

const pacifico = Pacifico({
  weight: "400",
  display: "swap",
  variable: "--font-pacifico",
});

...
We will then use this variable inside the tailwind.config.js by extending the fontFamily theme and attribute this CSS variable to a tailwind variable.
// tailwind.config.js
module.exports = {
  content: ["./pages/**/*.{js,ts,jsx,tsx}", "./components/**/*.{js,ts,jsx,tsx}"],
  theme: {
    extend: {
      fontFamily: {
        pacifico: ["var(--font-pacifico)"],
      },
    },
  },
  plugins: [],
};


// component.js
export default function Component() {
  return (
    <div className="font-pacifico">
      ...
    </div>
  )
}
Next.js 13 fonts : dos and don't [VIDEO]